Thursday, July 19, 2007

New door Gaskets & Interior Mods

Been a while since the last update -- with summer here, I've been in the garden.

Most of my recent work on the Bus has been on the interior. The engine, transmision, & brakes are good for now, & I've been driving her to work every day since mid-April. I'll want a new engine & clutch, & maybe a transmission, as well as proper load range D tires before I take her on extended road trips, but she's been on a 30 and a 50 mile cruise without any trouble, except popping out of 4th occasionally.

So, for all of you who've been waiting,here's some pics of the new door gaskets.


Driver's side:


Passenger's side:


Cargo hatch:


More of the gasket can be seen in this shot:


You'll also notice here the card catalog unit from work (discarded) that I've put in the rear for tools & spares, and of course, my helper, Titan the Wonder Cat.


In this picture from the muffler series,

you can see the new engine hatch seal:


Each seal was about $20 from Bus Depot.

Not bad, & a decent, if not perfect, fit.

Much better than the old, crusty ones:


The rust visible here is the worst on the vehicle,

likely because this door is not original.

It's underlying paint is red, while the rest

of the Bus was originally blue.

I ground down the rust and put on a layer
of tractor & implement primer, followed by
International Harvester White. It'll do.
someday, I'll get a better door, but it's not a top priority.


All these seals are dull, but important.

The front door seals keep out drafts,& keeps me from freezing!

The cargo hatch seal keeps out exhaust, & keeps me from axphyxiating!

The engine hatch seal helps keep the engine cool, by preventing it from sucking up it's own hot
air.


The seal I didn't replace is visible here:

This seal's actually in pretty good shape,

and a new one's over $100 from Bus Boys!

That's for a German seal, & therefore not

outrageous, but the price tag puts it seriously

into "thinking about" territory.


Now that I'm safe from drafts & fumes, on to the interior!

I was lucky enough to get a rare middle seat with this Bus, but, sadly, it had spent too long in a barn, & I just couldn't remove the aura of mouse pee. When my wife commented upon the "unique" atmosphere, I knew the seat had to come out. The corrosive effect of mouse urine had reduced the coils mostly to rust, anyway, & upholstery was beat, not to mention the (disintegrating) padding.

Some pics of the seat, soon to go into storage:


That afghan was covering a LOT!

I was tired of bits of spring falling on the floor,

anyway.


This was a good opportunity to clean out the

interior:


In the wide shot, you can see my '85 Dodge Ramcharger (winter ride) & my '85 Chrysler 5th Ave keeping the Bus company while I sweep out bits of disintegrated seat.

Here's the cargo bay, in it's new configuration:


I'm still looking for another middle seat, but for now, I have easy access to my tools, & with a bit of rearranging, I can put a Troy-Bilt Horse rototiller in this space.


The rugs , like the afghans, were my grandmother's.

The VT license plates are from the 70's.

The HU-110 plate is from my first car, a '70 Beetle.

The T-822 plate is from a family car, a '69 Beetle.


Next: Passenger cabin , headliner, rear cargo shelf!

Thursday, May 31, 2007

Putt-Putt Gets A New Muffler


OK; promised you pics of the exhaust work.

DISCLAIMER: INCREDIBLY TECHNOID CONTENT FOLLOWS.

IF YOU ARE NOT A VW GEEK OR A CAR FREAK, YOU'D BE BETTER OFF WATCHING GRASS GROW.

You've been warned.

Putt-Putt came with an aftermarket "extractor" type muffler which was actually not too bad as those systems go; it even had a decent provision for the heat risers.

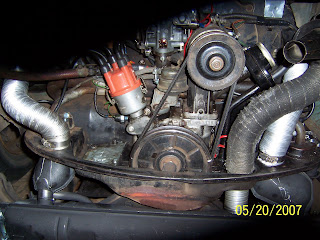
But, it was LOUD. Half the reason was a missing gasket at the right side heat exchanger. As it turned out, a fragment of the gasket was still there. It had burned out because the joint was loose. All the other joints were loose, too, and the metal rings that reinforce the doughnut gaskets were missing, so there was no way they could have ever sealed. You can see the soot on the end of the heat exchanger in the picture. No wonder it was so loud, and went BLAM! every time I took my foot off the gas. Because the system itself was OK, I saved it and hung it up in the garage. Never can tell when you might need something.

The leakage from the old mufffler had been getting sucked past the outside cover of the heat exchangers because of the non-functional gaskets, and had been getting into the passenger compartment whenever the heater was on, so this was a major safety item for me.

I prefer the stock muffler, so I ordered a complete kit from Bus Depot.

You can see here, as I started , that the rear valence is off, the old muffler is gone, and the heater hoses are tucked out of the way. I've polished the soot and grunge off the right side connections, but not the left. I used (gently) a brass cup brush on an electric drill on the exhaust ports, and also a small wire brush and some steel wool, taking care not to damage the relatively soft aluminum. On the steel tubes at the end of the heat exchangers, I used #80 emery cloth, the kind you get in big rolls at Harbor Freight.

I lucked out incredibly with this muffler. Every nut came off without a fuss, & none of the studs came out. I've never seen this before.

It's such a pleasure to work on a vehicle that's never seen salt! The difference is like night and day!

The only real hitch I ran into was connecting the heater hoses. With the aftermarket muffler, I had run the hoses straight down tho the heat exchangers. The stock muffler uses wide clamps on the bottom to seal the heat exchangers to a set of "mini" heat exchangers that serve as a connecting plenum, and a way to scavenge a little more heat from the exhaust. I didn't anticipate that I would need these clamps (duh) and in the parts stash that came with the Bus, I found only one. Luckily, a parts engine in the barn yielded (after some hammer-work) a rusty, crusty clamp (just one on that motor!) that I was able to clean up and use.

That wasn't the end of it, though. On the top side of the "mini" heat exchanger, a small piece of connecting pipe with a flange in the middle is suppposed to connect the "mini" heat exchanger with the heater hose. The extractor exhaust hadn't used these, either, and I hadn't remembered (20 years since last VW muffler) that they existed.

What to do? I could order the part from Bus Depot, but it woulld take a week or two to come in. Should have thought of it (D'ohh!!) when I ordered the muffler, and the clamps, too.

I ended up going to AutoZone to look at their assortment of exhaust adapters and tailpipes, figuring that what I needed was a short length of pipe just under 2" ID, and that shouldn't be too hard to find. I settled upon a piece of 1 7/8" flexible tailpipe. Cut into 3" sections with a 4" disc grinder (hacksaw made a mess of it) it turned out to be a decent friction fit in the top of the "mini" heat exchanger, and a close enough fit for the 2" aluminum hose I was using so that it clamped nicely without deforming the hose.

Rather than trust the friction fit, though, I wired the hoses in place, as you can see.

Woo-Hoo! Most of the major hurdles cleared!

Tightened down the flange gaskets at the heat exchangers and heat risers (aligning the heat riser tubes was a PITA as usual) tightened the doughnut clamp/gasket assemblies on the heat risers (WITH steel rings in place for proper compression) and, at last, it was time to move on to the tailpipe.

How can such a tiny exaust system be SO much work? Grumble, grumble...

Ok, the tailpipe attaches with another clamp/ring/doughnut gasket assembly, & a couple of braces.

Here's a problem: the tabs on the tailpipe and muffler won't align, because the bumper brace is in the way.

Why is it in the way? Because it's bent. Came that way.

The extractor muffler hung so low that it wasn't a problem. Maybe, that muffler was a workaround for the collision damage.

Grumble, grumble, grumble.....

OK, first, we put a floor jack under that end of the bumper, and jack until the bumper straightens up, but the wheels are still on the ground. Don't want to put too much stress on the bumper mounting area, incase it's tender.

You'll notice, if you look at the photos in the previous installment, that the bumper is a lot straighter than it was in April. This is why.

Still, the flanges won't meet.

Argh.

Time for a briliant improvisation.

Found a piece of all-thread and cut off 4 inches.

Together with a stack of washers and two nuts, it
makes a very nice spacer, if I do say so myself, and the tailpipe is still higher than the extractor muffler and tailpipe were.

Next, (no, it can't be THAT late!) a large bracket has to be attached. It takes some puzzling to figure out that it bolts to the two notches at the left end of the muffler. You can see the bolts in the pic. I have never seen this bracket before. I'm sure my '70 Bus didn't have one... Hmmm... maybe that's why the tailpipe used to fall off?


Here's a worm's-eye view of the bracket and tailpipe. Thanks, Bus Depot, for including this bracket! I suspect a lot of kits don't. Must be a lot of dragging tailpipes out there...

Home stretch, now, only 2 more clamps!

One wide , round one to clamp the tailpipe to the bracket, & one sort of oval one to squeeze the straight and curved sections of the tailpipe together. Sections? Yes, EVERY piece of this system has, itself, multiple pieces.

Sigh.


Finally, I can stare down a finished tailpipe.

It is now 3:00 a.m. I've been working on this thing since lunch.

Stumble off to bed..."Where've you been?"

" With the other woman".

"The one in the garage?"

"Yes, that one".

"Oh, O.K."

I'll say it again, she's a keeper...

ZZZZZZzzzzzzzzzzzzzzzzzzzzz....

OK, next day, I don't even want to talk about how late I got up, time to finish this!

Heater hoses securely wired?

Check!


All nuts & bolts tight?

Check!

Pre-heat snorkel hose installed? No problem, swiped one off the Dodge...

Check!

OK, Let's put the rear valence back on. tighten the screws down, and fire her up!


VRRRooommmm.....putt,putt,putt,putt...

No leaks!!! Wooo- Hooooo!!!!!

Way quieter, too..why, I almost don't miss the skin on my thumbs...

Time for a celebratory adult beverage.

Maybe two.


Next: Weatherstripping and interior modifications.

Back to Blog: Putt-Putt Passes Inspection!!

Wow!

Hard to believe that I haven't updated my Bus blog since early April, but the calendar doesn't lie..

So, in response to my vast following, I'm finally uploading new pics, detailing my Bus achievements over the last month & a half (yawn).

First off, she PASSED INSPECTION!!! Needed NO work!! And, since Putt-putt's a '71, she requires safety inspection only in NYS, just 10 bucks!

It doesn't get much better than that...

I'll now proceed to bore my reading public (both of you) with some details of how I got to this point.

I think when I left off, I was in the middle of removing the graphics that came with the Bus.

Here's some shots of how it turned out:


Now, not all the stuff I did since April was neccesarily required by NYS, but it was required by me. Between my inspection & the state's, I believe it's safe on the road now.

Don't you feel safer now?

I thought so...

One of the first big things I did was to replace the brake servo & master cylinder, to get the power brakes working again. What a difference! I've never driven an air-cooled VW with brakes like these!

To people out there driving with non-functional brake servos: Replace them. Yes, it's expensive, but you'll never regret it.

Here's a shot of the new master cylinder & servo:


And another shot , from the front side, featuring
my chief inspector:


"SOMEDAY, YOU'LL ALL WORK FOR ME!!"


And, the chief deputy inspector:

"SQUAAAAWK!!!"


Do you think I passed?


Also, I found that the brake hoses, though they looked good, had internal problems & needed replacement, so I put in all new ones. that cured
some bizzare drifting behavior that the Bus had
had since the day I drove it home. Seems the right rear hose was partially blocked.

New hose, left rear (I think):


And, a front brake hose, right, I think:


She stops straight & sure now!!


Next: Putt-Putt gets a new Muffler!!!

Monday, April 9, 2007

Taillight Rehab

Because of it's remarkable state of preservation, all the lights worked when we brought this Bus home, even the reverse lights. The right rear taillight did develop some funkyness, though, after I'd driven it a couple of times.

As it turned out, the socket was really tired. One of the spring-loaded contacts inside had collapsed, & no amount of fiddling would put the bulb in a position where it would light reliably.

Bus Depot has new repro taillight assemblies, of course, & at $20 a pop, they're even not too expensive, but I kept wondering if I couldn't do something with what I had on hand.

Fortunately, I had a used repro taillight asembly to play with, & I'm posting the results here in case they might be useful.

My other ride is an '85 Dodge Ramcharger, another rust-free Southern survivor that nonetheless has the corrosion issues common to 22-year-old vehicles. I've replaced a couple of turn signal sockets, & I'm always on the lookout in our local self-serve junkyard for more, since it's difficult to find good-quality repros. The socket in the last one I bought was so loose, I couldn't make it work, & ended up going to the junkyard for a used one. That's when I started collecting them.

I collect weird things.

These sockets can be found on early to mid-80's Dodge trucks, and also on Jeeps of the same vintage.

The wiring configuration is the same as on a Bus: one ground lead, & two hot leads, one for the taillight, one for the turn signal. The bulb is the same, too: a dual-element GE# 1157.

The VW socket attaches to the back of the taillight with two metal tabs which are easily bent aside, allowing the socket to be removed (Sorry, don't have a pic of that; camera battery pooped out).

That leaves a flat surface with a hole in it which just has to be enlarged a bit & shaped with the proper slots for the Chrysler-style socket:

You can see here the tools I used to shape the hole: a Dremel with a couple of stones, a triangular file, a round chain saw file, & a half-round miniature needle file.

Once I'd cut the hole to match the shape of the Chrysler socket, it slotted in nicely with just a small counter-clockwise twist to secure it. There's a gasket that Chrysler uses between the plastic socket and the metal housing; since the metal in the VW housing was thinner than whatever one the Chrysler socket had been in, I had to use two gaskets to make up the gap. I was lucky to have several sockets with gaskets on hand.

If you try this, you should try to find an extra gasket, or maybe pull a couple of sockets. the ones I got cost me $3.00 each at the local u-pull junkyard. I've bought them at other yards for as little as $1.00.

It isn't stock, but I think this socket represents an improvement. It's much more weatherproof than the original, and it allows for bulb replacement without removing the taillight lens -- just twist & pull the socket out, change the bulb, & twist & push it back in! Best of all, if you use male spade terminals on the end of the pigtails, you can connect to the female spade terminals on your VW harness without cutting into the stock wiring. I wrapped the connections with self-fusing rubber tape to waterproof them. I can pull it all apart & connect an unmodified stock taillamp assembly any time I want.

Now, I'm waiting for my other socket to fail, so I can modify the left side lamp, too!!