Monday, April 9, 2007

Taillight Rehab

Because of it's remarkable state of preservation, all the lights worked when we brought this Bus home, even the reverse lights. The right rear taillight did develop some funkyness, though, after I'd driven it a couple of times.

As it turned out, the socket was really tired. One of the spring-loaded contacts inside had collapsed, & no amount of fiddling would put the bulb in a position where it would light reliably.

Bus Depot has new repro taillight assemblies, of course, & at $20 a pop, they're even not too expensive, but I kept wondering if I couldn't do something with what I had on hand.

Fortunately, I had a used repro taillight asembly to play with, & I'm posting the results here in case they might be useful.

My other ride is an '85 Dodge Ramcharger, another rust-free Southern survivor that nonetheless has the corrosion issues common to 22-year-old vehicles. I've replaced a couple of turn signal sockets, & I'm always on the lookout in our local self-serve junkyard for more, since it's difficult to find good-quality repros. The socket in the last one I bought was so loose, I couldn't make it work, & ended up going to the junkyard for a used one. That's when I started collecting them.

I collect weird things.

These sockets can be found on early to mid-80's Dodge trucks, and also on Jeeps of the same vintage.

The wiring configuration is the same as on a Bus: one ground lead, & two hot leads, one for the taillight, one for the turn signal. The bulb is the same, too: a dual-element GE# 1157.

The VW socket attaches to the back of the taillight with two metal tabs which are easily bent aside, allowing the socket to be removed (Sorry, don't have a pic of that; camera battery pooped out).

That leaves a flat surface with a hole in it which just has to be enlarged a bit & shaped with the proper slots for the Chrysler-style socket:

You can see here the tools I used to shape the hole: a Dremel with a couple of stones, a triangular file, a round chain saw file, & a half-round miniature needle file.

Once I'd cut the hole to match the shape of the Chrysler socket, it slotted in nicely with just a small counter-clockwise twist to secure it. There's a gasket that Chrysler uses between the plastic socket and the metal housing; since the metal in the VW housing was thinner than whatever one the Chrysler socket had been in, I had to use two gaskets to make up the gap. I was lucky to have several sockets with gaskets on hand.

If you try this, you should try to find an extra gasket, or maybe pull a couple of sockets. the ones I got cost me $3.00 each at the local u-pull junkyard. I've bought them at other yards for as little as $1.00.

It isn't stock, but I think this socket represents an improvement. It's much more weatherproof than the original, and it allows for bulb replacement without removing the taillight lens -- just twist & pull the socket out, change the bulb, & twist & push it back in! Best of all, if you use male spade terminals on the end of the pigtails, you can connect to the female spade terminals on your VW harness without cutting into the stock wiring. I wrapped the connections with self-fusing rubber tape to waterproof them. I can pull it all apart & connect an unmodified stock taillamp assembly any time I want.

Now, I'm waiting for my other socket to fail, so I can modify the left side lamp, too!!


Interior & New Cargo Hatch Gasket

As promised, here are pics of a few changes to the interior, and installation of a new rear cargo door seal.

You can see both the speaker I put in for the working AM radio I bought on thesamba, and the bag I brought back from a recent wine tour (now a litter bag).

Also, I've installed a new rear hatch seal from Bus Depot. Used various pokey/scrapey implements to clean the last bit of old rubber out of the groove, then glued the new one in place with Weldwood contact cement.


Here's the crusty old seal:


Another interior addition has been a pair of fire extinguishers, front and rear.


Front:


And rear:


And, of course, I could never have finished the installation without my helper:


Next: Taillight rehab.

Removing Graphics

After much thought, I decided that the graphics the Bus came with, though cute, just weren't what I wanted. How to get them off, then? It looked like an incredible amount of buffing, since some of that paint was really thick, & I didn't want to run the risk of overheating & burning the underlying or surrounding paint.

I ended up using a chemical stripper. Some who read this will be aghast, & say the buffer was the way to go. Based upon experience, and hindsight, they may well be right.

But, that ship has sailed, as they say, & I think the results are pretty good.

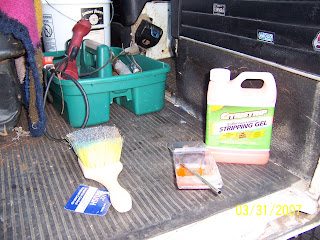
I tried methelyne chloride (Kleen-Strip) first, on one of the numbers on the rear hatch. that was NOT the way to go. Way too active, & wanted to take the under lying paint off, too. Since the paint used for the graphics was probably acrylic, I reasoned that a relatively benign agent could lift the graphics while leaving the underlying enamel mostly unaffected.


Citra-Solv worked, for the most part, the way I wanted. A couple of areas were damaged, but that was user error (leaving it on too long). I made up some touch-up paint using plain white tractor & implement enamel mixed with Allis-Chalmers White (both from Tractor Supply) & I'm using a fine brush to apply it.

Now, I can here some collective shudders out there, but that's the way I'm doing it, & the touched-up areas easily pass the 10-ft/10mph rule.

I applied the Citra-Solv with an acid brush, let it sit until I could scrub some paint off with the brush, then scrubbed hard with the brush & followed with a water rinse, wiped with a paper towel, & removed what traces were still clinging on with a paper towel & acetone.


As you can see, the letters came up easily enough. The front end, especially, looks much better, I think.

The one big problem I had was related to temperature, & my own laziness. I'd been working for several days in my garage, where I have a furnace that can get it up to 40 or 50 (Farenheight) if it's at least 20 outside. I'd been letting the stuff sit for hours while I worked on other things, & sometimes overnight in 30 to 40 degree temperatures.

Well, we had a couple of warm days, and I was out one night, working without the furnace in 60 degree temperatures, when my wife called on the cell to let me know dinner was ready. I left the stripper on, since I'd safely left it on for long periods before, & went in for a wonderful home-cooked dinner (Thanks, Sherrie!) accompanied by an excellent bottle of wine.

Being full of food & wine, I decided the Bus would be OK overnight, not accounting for the 30-40 degree rise in the temperature.

Went out in the morning to find a LARGE AREA OF ORIGINAL PAINT PEELING OFF!!!

Horrors!!!

I quickly scrubbed & rinsed & acetone-wiped the area, to minimize the damage. Later, when everything had dried, I put aluminum tape over it to stave off the rust, & I'll paint it later.

LESSON LEARNED: If you try this , be really careful about temperature. I remember (now, D'ohh!!) from high-school chemistry, that chemical reactions are facilitated by higher temperatures. In this case, I think the effect was exponential. What was a stable, slow acting agent at 30-40 degrees became much more active at 60 degrees!

It should all work out, though, I'm not going for a showroom finish here, & I may very well put on some graphics of my own. I've got good matching touch-up paint.

There are some "ghost " images left from the original graphics, & some yellowing here & there, but that should all buff out well enough. Remember, 10 ft/10mph!!!!

Next: Interior & Rear Cargo Hatch Gasket.